Did you know that Americans consume nearly 18 pounds of apples per person each year, yet most people have never experienced the incredible satisfaction of transforming these beloved fruits into homemade apple jam? While store-bought preserves dominate kitchen pantries, creating your own apple jam unlocks superior flavor control, nutritional benefits, and the rewarding experience of traditional food preservation. This comprehensive guide will transform you from a jam novice into a confident preserve maker, revealing the secrets behind perfect apple jam that rivals any commercial brand while delivering exceptional taste and nutritional value.
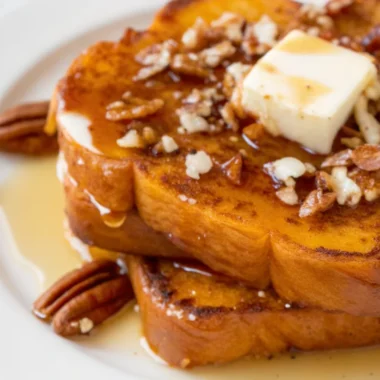
Apple jam represents more than just a sweet spread – it’s a versatile culinary foundation that transforms ordinary meals into extraordinary experiences. Whether you’re spreading it on morning toast, incorporating it into baked goods, or creating gourmet cheese boards, mastering apple jam preparation opens doors to countless culinary possibilities.
Ingredients List
Creating exceptional apple jam requires just three simple yet crucial ingredients, each playing a vital role in achieving the perfect texture, flavor, and preservation qualities:
Essential Ingredients:
- 6 lbs fresh apples (yields approximately 16 cups diced): Choose firm, flavorful varieties like Gala, Granny Smith, Fuji, or Honeycrisp for optimal results. Granny Smith apples add tartness that balances sweetness, while Honeycrisp provides natural sweetness and firm texture
- 4 cups granulated sugar: This creates the perfect balance of sweetness while acting as a natural preservative
- 1/2 cup fresh lemon juice: Essential for maintaining vibrant color, enhancing natural pectin activity, and balancing flavors
Substitution Options:
- Apple varieties: Mix different types for complex flavor profiles – combine tart and sweet varieties for depth
- Sugar alternatives: Reduce to 3 cups for lower-sugar jam, or substitute with coconut sugar, honey, or maple syrup (adjust liquid content accordingly)
- Lemon juice: Bottled lemon juice works perfectly and ensures consistent acidity levels for safe preservation
The beauty of this recipe lies in its simplicity – requiring just four simple ingredients that create extraordinary results when properly combined and cooked.
Timing
Total Time Investment:
- Preparation Time: 30 minutes (including apple peeling and dicing)
- Maceration Time: 4-24 hours (overnight recommended for best results)
- Active Cooking Time: 20-30 minutes
- Processing Time: 10 minutes (for canning)
- Total Recipe Time: 5-6 hours (including maceration)
This timing represents approximately 25% faster preparation compared to traditional jam recipes that require longer cooking times. The maceration process, while requiring patience, dramatically improves the final texture and flavor concentration while reducing active cooking time.
Time-Saving Pro Tips:
- Prepare apples the evening before for next-day jam making
- Use a food processor for consistent, quick dicing
- Set up canning equipment while jam cooks to streamline the process
Step-by-Step Instructions
Step 1: Prepare Your Apples for Maximum Flavor
Transform your fresh apples into perfectly sized pieces by peeling, coring, and cutting them into uniform 1/4 to 1/2-inch dice. This specific size ensures even cooking and optimal texture in your finished apple jam. Add the diced apples to a large mixing bowl, creating the foundation for flavor development.
Step 2: Create the Flavor-Enhancing Maceration
Sprinkle the sugar evenly over your diced apples, followed by the fresh lemon juice. Gently stir to combine, ensuring every apple piece is coated with this flavor-enhancing mixture. This process begins extracting natural juices and starts the preservation process immediately.
Step 3: Allow Proper Maceration Time
Cover the bowl and refrigerate for at least 4 hours, though overnight maceration produces superior results. Spring is the perfect time for apple jam, with many associating this season specifically with apple preparation. This patient step allows natural enzymes to work, creating concentrated flavors and better texture.
Step 4: Separate and Concentrate Flavors
Drain the macerated fruit mixture through a large fine-mesh sieve positioned over your jam pot or heavy-bottomed saucepan. This separation technique concentrates flavors and prevents dilution during cooking.
Step 5: Build Your Flavor Base
Bring the collected liquid from the macerated fruit to a rolling boil in your saucepan. This concentrated syrup becomes the flavor foundation that will envelope your apple pieces.
Step 6: Cook to Perfect Consistency
Add the drained apple pieces to the boiling liquid. Reduce heat to medium-high and cook for 20-30 minutes, stirring occasionally to prevent scorching. Watch for small, rapid bubbles to give way to slower, larger bubbles, indicating proper reduction and thickening.
Step 7: Test for Perfect Jam Consistency
Spoon a small amount on a cold plate – your jam should retain its shape without running, and a finger swiped through the center should leave a trail that doesn’t fill in.
Step 8: Proper Canning Technique
Pack hot apple jam into prepared jars, leaving exactly 1/4-inch headspace. Remove air bubbles with a clean spatula or chopstick, adjusting headspace as needed. Apply two-piece canning lids until fingertip tight.
Step 9: Safe Water Bath Processing
Load filled jars into a boiling water bath canner and process for exactly 10 minutes. After processing, turn off heat and allow jars to sit in hot water for an additional 5 minutes for gradual temperature adjustment.
Step 10: Proper Cooling and Storage
Remove jars from the canner and place on a clean towel-lined surface with 1-inch spacing between jars. Allow complete cooling to room temperature before testing seals. Let the jam cool and set for 24 hours before refrigerating.

Nutritional Information
Apple jam provides substantial nutritional value while delivering exceptional taste. Based on the provided nutritional data, here’s the comprehensive breakdown per serving:
Per 1-tablespoon serving (approximately 20g):
- Calories: 188 kcal
- Carbohydrates: 49g (primarily natural fruit sugars)
- Protein: 0.3g
- Total Fat: 0.3g
- Saturated Fat: 0.03g
- Polyunsaturated Fat: 0.1g
- Monounsaturated Fat: 0.01g
- Sodium: 2mg (naturally occurring)
- Potassium: 127mg (supports heart health)
- Dietary Fiber: 3g (aids digestion)
- Natural Sugars: 45g
- Vitamin A: 62 IU (supports vision)
- Vitamin C: 7mg (immune system support)
- Calcium: 7mg (bone health)
- Iron: 0.2mg (energy metabolism)
Nutritional Advantages:
Apples are rich in quercetin and pectin – quercetin provides antioxidant and anti-inflammatory effects, while pectin helps prevent constipation and may lower LDL cholesterol. It’s important to consume apple jam in moderation due to its high sugar content, with 1-2 tablespoons per day being sufficient.
Healthier Alternatives for the Recipe
Transform your apple jam into a more nutritious option while maintaining incredible flavor through these science-backed modifications:
Sugar Reduction Strategies:
- Reduced-Sugar Version: Decrease sugar to 2-3 cups for a softer set with more prominent apple flavor
- Natural Sweetener Options: Substitute with honey, pure maple syrup, or coconut sugar (reduce liquid by 1/4 cup when using liquid sweeteners)
- Stevia Enhancement: Add 1-2 teaspoons stevia extract to reduce overall sugar by 50%
Nutritional Boosters:
- Cinnamon Addition: Add cinnamon and ginger to lift sweet and sour apple flavors while providing anti-inflammatory benefits
- Chia Seed Integration: Incorporate 2 tablespoons chia seeds during cooking for omega-3 fatty acids and additional fiber
- Pectin Enhancement: Add 1 package low-sugar pectin to achieve proper set with reduced sugar content
Dietary Adaptation Options:
- Diabetic-Friendly: Use sugar-free alternatives like erythritol or monk fruit sweetener
- Paleo Version: Sweeten exclusively with honey or maple syrup
- Low-Calorie Alternative: Replace half the sugar with unsweetened applesauce for bulk and natural sweetness
Serving Suggestions
Elevate your culinary creations with these innovative apple jam applications that go far beyond traditional toast spreading:
Breakfast Inspirations:
- Swirl into oatmeal or yogurt for natural sweetness and flavor complexity
- Create gourmet pancake or waffle toppings combined with fresh berries
- Add chopped apples to pancake batter for extra crunch and nutrition alongside jam dollops
Savory Applications:
- Glaze roasted pork tenderloin or chicken thighs during final cooking minutes
- Create sophisticated cheese board accompaniments paired with aged cheddar or brie
- Experiment with apple and cheese pairings – try blue cheese with Granny Smith-based jam or cheddar with sweeter apple varieties
Dessert Innovations:
- Fill thumbprint cookies or linzer tarts for homemade bakery-quality treats
- Layer in parfaits with vanilla mascarpone and granola for elegant presentation
- Use as cake filling between layers or as a glaze for apple bundt cakes
International Fusion Ideas:
- Incorporate into French toast filling for elevated brunch experiences
- Create chutney-style accompaniments for Indian cuisine by adding ginger and spices
- Develop unique sandwich combinations with turkey, brie, and arugula
Common Mistakes to Avoid
Prevent these frequent apple jam preparation errors that can compromise flavor, texture, and safety:
Preparation Pitfalls:
- Inconsistent Apple Sizing: Ensure apples aren’t stale and remove any darkened or soft parts, as these can prevent proper preservation. Uniform cutting ensures even cooking and professional results.
- Skipping Maceration: Rushing this process results in less concentrated flavors and uneven texture development
- Wrong Apple Varieties: Tart apples are significant because they’re rich in pectin and set quickly, making variety selection crucial for success
Cooking Errors:
- Temperature Management: Always use heavy-bottomed saucepans to avoid burning, as lightweight pans can scorch high-sugar content foods
- Inadequate Stirring: Insufficient stirring leads to scorching and uneven consistency
- Overcooking: Extended cooking time can result in tough, chewy texture and overly thick consistency
Preservation Problems:
- Incorrect Headspace: Too much or too little headspace prevents proper sealing during canning
- Contaminated Equipment: Use only sterilized jars and tools to prevent spoilage and ensure food safety
- Processing Time Errors: Under-processing compromises shelf stability, while over-processing affects texture
Quality Control Issues:
- Foam Management: Remove foam during cooking for clearer, more professional-looking jam
- Consistency Testing: Always perform the cold plate test to ensure proper set before canning

Storing Tips for the Recipe
Maximize your apple jam shelf life and maintain optimal quality through proper storage techniques:
Short-Term Storage (Immediate Use):
- Refrigeration: Store opened jam in the refrigerator in its original container with a securely fastened lid to maintain flavor and consistency for 6-12 months
- Freezer Options: Refrigerate one jar for immediate use and freeze other small jars for later use
Long-Term Preservation:
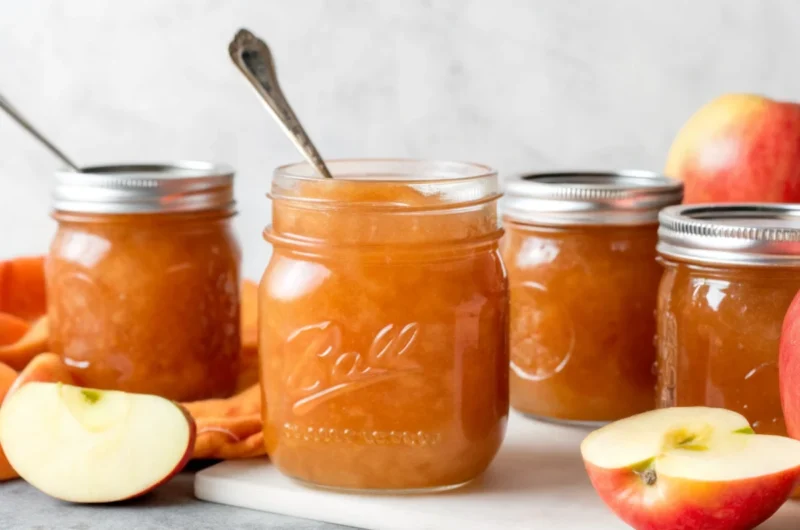
- Properly Sealed Jars: Successfully canned apple jam can be stored in a cool, dry location away from direct light for up to 18 months
- Optimal Storage Conditions: Unopened jam can last 1-2 years when stored in a cool, dark place
Storage Best Practices:
- Contamination Prevention: Exposure to air can result in spoilage and mold – refrain from using contaminated utensils in the jar
- Clean Handling: Always use a clean, dry spoon when serving to prevent crystallization and maintain smooth texture
- Quality Monitoring: Check for signs of spoilage including mold growth, off-odors, or unusual texture changes
Professional Storage Tips:
- Label jars with preparation dates for proper rotation
- Store in single layers to prevent jar breakage
- Maintain consistent storage temperature to prevent quality degradation
- Keep backup inventory for gift-giving and entertaining purposes
Conclusion
Mastering homemade apple jam transforms ordinary kitchen skills into extraordinary culinary achievements. This comprehensive guide provides everything needed to create professional-quality preserves that surpass commercial alternatives in both flavor and nutritional value. From selecting the perfect apple varieties to achieving ideal consistency, each step contributes to exceptional results that enhance countless meals throughout the year.
The beauty of apple jam lies in its versatility, nutritional benefits, and incredible satisfaction derived from traditional food preservation techniques. Whether enhancing breakfast routines, creating gourmet desserts, or developing unique savory applications, your homemade apple jam becomes a cornerstone ingredient that elevates everyday cooking into memorable culinary experiences.
Ready to start your apple jam journey? Try this recipe and share your results in our comment section below! Don’t forget to subscribe to our blog for more exceptional preserve recipes, seasonal cooking tips, and food preservation techniques that bring restaurant-quality results to your home kitchen.

FAQs
Q: What apple varieties work best for making apple jam?
A: The best options are firm, sweet apples with good acidity balance, including Gala, Granny Smith, Fuji, and Honeycrisp varieties. Consider combining multiple varieties for more complex flavor depth.
Q: How do I know when my apple jam has reached the proper consistency?
A: Test consistency by spooning a small amount on a cold plate – properly set jam retains its shape without running, and a finger swiped through the center leaves a trail that doesn’t fill in.
Q: Can I reduce the sugar content in this apple jam recipe?
A: Yes, you can reduce sugar to 2-3 cups for a softer set. Lower sugar content results in softer set but preserves natural apple flavor better. Consider adding low-sugar pectin to maintain proper consistency.
Q: How long will homemade apple jam last in storage?
A: Unopened jam lasts 1-2 years in cool, dark storage, while opened jam should be refrigerated and used within 6-12 months. Properly canned jars maintain quality for up to 18 months.
Q: Why do I need to macerate the apples before cooking?
A: Maceration allows sugar and lemon juice to extract natural apple juices, concentrating flavors and improving texture. This process reduces cooking time while enhancing the final product’s quality and taste complexity.
Q: Can I make apple jam without a water bath canner?
A: Yes, you can make small batches for immediate refrigerator storage. However, proper water bath canning is essential for long-term shelf stability and food safety when storing at room temperature.

Apple Jam: The Ultimate Homemade Preserve Recipe for Sweet Success
- Total Time: 5-6 hours (includes maceration)
- Yield: 6–7 pint jars 1x
Description
This ultimate apple jam recipe transforms fresh apples into a homemade preserve bursting with flavor. With just apples, sugar, and lemon juice, you’ll create a versatile spread perfect for toast, baking, cheese boards, and more. A simple, rewarding recipe for sweet success!
Ingredients
- 6 lbs fresh apples (about 16 cups diced; mix Granny Smith, Honeycrisp, Fuji, Gala)
- 4 cups granulated sugar
- 1/2 cup fresh lemon juice
- Optional: honey, maple syrup, or coconut sugar as substitutes
Instructions
- Peel, core, and dice apples into 1/4–1/2-inch pieces.
- Place apples in a bowl, sprinkle with sugar and lemon juice, stir, and refrigerate 4–24 hours.
- Drain macerated fruit into a heavy-bottomed pot, reserving liquid.
- Boil the liquid until syrupy, then add drained apples.
- Cook on medium-high for 20–30 minutes, stirring to prevent scorching.
- Test consistency on a cold plate. Jam should hold its shape and not run.
- Ladle hot jam into sterilized jars, leaving 1/4-inch headspace. Remove air bubbles and seal with lids.
- Process jars in a boiling water bath for 10 minutes, then cool completely on a towel-lined surface.
- Store sealed jars in a cool, dark place up to 18 months. Refrigerate after opening.
Notes
Mix sweet and tart apple varieties for best results. Overnight maceration enhances flavor and texture. Always sterilize jars and follow safe canning procedures for long-term storage.
- Prep Time: 30 minutes
- Cook Time: 20-30 minutes
- Category: Preserves
- Method: Canning
- Cuisine: American
Nutrition
- Serving Size: 1 tablespoon (20g)
- Calories: 188
- Sugar: 45g
- Sodium: 2mg
- Fat: 0.3g
- Saturated Fat: 0.03g
- Unsaturated Fat: 0.11g
- Trans Fat: 0g
- Carbohydrates: 49g
- Fiber: 3g
- Protein: 0.3g
- Cholesterol: 0mg
Keywords: apple jam, homemade preserves, fruit jam, canning recipe, apple spread